My Christmas chalkboard with one of my favorite holiday songs in mind. Silent Night.
December 7, 2013
November 27, 2013
November 12, 2013
Pinecone Turkey Place Holders
These make for a great kids craft but can also become beautiful, unique place holders for your Thanksgiving table.
Items needed for this project:
A Pinecone
A walnut
Red paint
A small paint brush
Craft foam in gold, brown, orange and red.
Googly eyes
Glue (craft or hot glue)
A Marker
Scissors
Step 1: Paint a light coat of red on your walnut. Let dry.
Step 2: Glue on the eyes.
Step 4: Glue the walnut in place using a generous amount of glue. We used Elmer's glue because the kids helped with this project. However if you would like them to be more secure I would suggest hot glueing it down.
Step 5: Cut a scalloped circle out of the brown foam. Also cut a circle out of the gold that is a little smaller. Then cut an orange scalloped circle just a bit smaller than the gold.
Step 6: Glue them together. Let dry and write a name on it.
Step 7: Glue in place on the top/back row of the pinecone.
Step 8: Cut a small tear drop out of red and glue the point and place it under the chin of the walnut.
Step 9: Cut out a small gold triangle and glue to the walnut just below the eyes.
Step 10: After it has had plenty of time to dry place it on your Thanksgiving table and enjoy!
Note: (The clue will dry clear. I just took this picture as soon as I had it together.)
November 8, 2013
October 26, 2013
September 12, 2013
August 17, 2013
DIY - 10 Step Chevron Burlap Wreath
Keep in mind that you can adjust sizes to fit the space you are making it for.
For this project you will need the following supplies.
For this project you will need the following supplies.
1 - 18 inch wire wreath form.
1 - 10 yard / 5 inch roll of brown burlap. It can be any width. (The larger the width the larger the poofs.) You can use wired or non wired burlap. Each works just as well.
1 - 15 yard / 5 inch roll of solid colored burlap
1 - 15 yard / 5 inch roll of Chevron burlap
1 - package tan pipe cleaners
Any embellishments such as an initial, flowers, etc.
I happened to catch a 50% off sale at Hobby Lobby today so I stocked up on several colors and couldn't decide on a color scheme until I laid them out together. I chose brown, yellow and the cream/grey chevron for this project.
 |
Lets begin...
The wire wreath will be broken down into two sections to make explanations easier. The inner circle and the outer circle.
STEP 1:
Twist tie a pipe cleaner between each section of the inner circle. Don't worry if they slide around or feel loose. As you add the burlap it will begin to tighten and stay in place. It really works to your benefit in the end when it is time to fluff your poofs.
STEP 2:
Twist tie a pipe cleaner to each divider (not the outer ring, tie it to base of the divider post) on the outer circle.
STEP 3:
Take the end of your brown burlap. Bunch it up and twist tie it on to one of the pipes on the inner circle.
STEP 4:
Move down the burlap about 12 inches. Make another bunch and add it to the next pipe in the inner circle.
Continue this process all the way around finishing on top of the pipe cleaner you started at. DO NOT CUT YOUR BURLAP YET!
At this point you may be thinking that it doesn't look very full. Don't worry it will in the end.
STEP 5:
Continuing with the end of your burlap that is hanging to the side. Make another 12 inch bunch and tie it onto the outer pipe cleaner closest to your right.
Again, continue this process all the way around the outer circle. Once you reach your last pipe cleaner trim the excess off and twist tie the end down.
This is the finished "shell" for decorating your wreath.
STEP 6:
Take the chevron burlap and place it over the solid color burlap. Bunch the end and twist tie it onto one of the inner circle pipes.
This time you are only going to use 10 inch bunches.
You WILL NOT have enough solid/chevron fabric to go to the last few pipes. It is okay. Go to the next step.
STEP 7:
Using the leftover brown burlap. Make a bow and slide a pipe cleaner though the back of the knot and secure it to the wreath where you have an opening with no decorative burlap.
STEP 8:
Fluff and hide. Starting with the inner circle brown. Place your hand inside each poof and fluff it out. At this time you can also tuck all of your pipes towards the back of the wreath or trim them down. When you pull the solid/chevron burlap alternate the way you separate each loop so that color is spread evenly throughout your wreath.
STEP 9:
This is where the real fun begins. Adding embellishments. Take this wreath to another level by adding an initial, a sign, flowers, decorations, extra ribbons, etc.
STEP 10:
Hang it and enjoy!
I hope you enjoyed this tutorial. Check back to see what I will be crafting next.
June 28, 2012
Garden Update
 |
| DAY 15 |
 |
| DAY 22 |
 |
| DAY 31 - We have summer squash! |
 |
| Day 36 |
 |
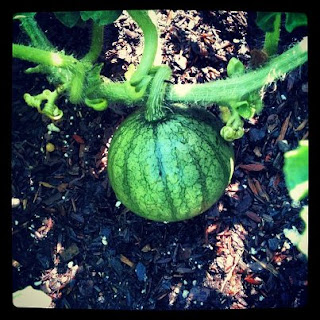
| DAY 37 - We have a baby watermelon! It was about the size of a dime. |
 |
| 4 days later it was the size of a golf ball!! |
 |
| DAY 43 - Our first harvest :) |
 |
| DAY 45 - today |
 |
| Our 1st watermelon at 8 days old. It is the size of a baseball. |
 |
| We had a windstorm come in a few days after we planted our seeds. It kicked up the dirt enough to blow our bell pepper seeds into our carrots. We now have hybrid spicy carrots. lol |
We currently have 6+ summer squash, 2 pumpkins, 7 watermelons and 1 cantaloupe. We are a few months away from being able to harvest the carrots, onions, corn, bell peppers and broccoli. Unfortunately the broccoli was chewed up by grasshoppers so we aren't sure if they will produce anything. Overall this has been a great experience and we cannot wait to eat our homegrown goodies!
Look who turned 2
Two weekends ago we celebrated Skylar's 2nd birthday with a weekend full of fun, sun and of course CAKE!
Sunday was Skylar's actual birthday which also fell on Father's Day this year. We decided to take Skylar to Chuck E Cheese. She LOVED it!! Skylar's Birthday weekend was a success full of fun memories.
Skylar woke up Saturday morning in the best mood. Shortly after she woke we brought her out to the living room to open a few gifts from mommy and daddy. It amazes me to think that last year she needed my assistance and this year she wanted to do it all by herself.
 |
| Such a BIG girl now! |
 |
| Enjoying her new water table |
 |
| Trying out her new car. Of course her favorite part was the radio. |
We let Skylar play all morning with her new toys and then got lunch and put her down for nap so that she would be plenty rested for her party.
 |
| Every little girl needs a castle :) |
 |
| Madyson, Jake and Skylar swinging |
 |
| Love those smiles! |
 |
| Grandma and her girls |
 |
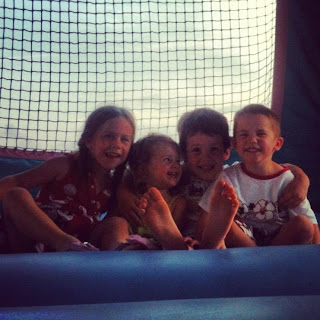
| cousins Madyson, Skylar, Jake and Luke |
 |
| C A K E!!! |
 |
| All smiles :) |
 |
| Checking out the horn on her big girl bike. |
Subscribe to:
Comments (Atom)


